👨🏭 Implementing the Issues Detail View 🦫

The #1 Padel Score Tracker Companion
With seamless point counting on your Apple Watch, Padel Time ensures precision and eliminates disputes, leaving you to focus on the game. You just need to raise your arm and click on the winning team on each point, nothing else.
This message is brought to you by a sponsor who helps keep this content free for everyone. If you have a moment, check them out. Your support means a lot!
Welcome to issue #43 of the iOS Coffee Break Newsletter 📬 and to the 6th issue of the "Building a Newsletter App" series!
Some weeks ago, I showed you how to test my issues view model using Apple's new Swift Testing framework.
This week, I am diving deeper into implementing the issue detail view. Simply listing all newsletter issues isn't very interesting, right? 😒 Ideally, tapping on an issue should navigate to a detailed page with more information.
In this edition, I will walk through how I built the detail view and how I handled navigation between screens. Let's explore the approach!
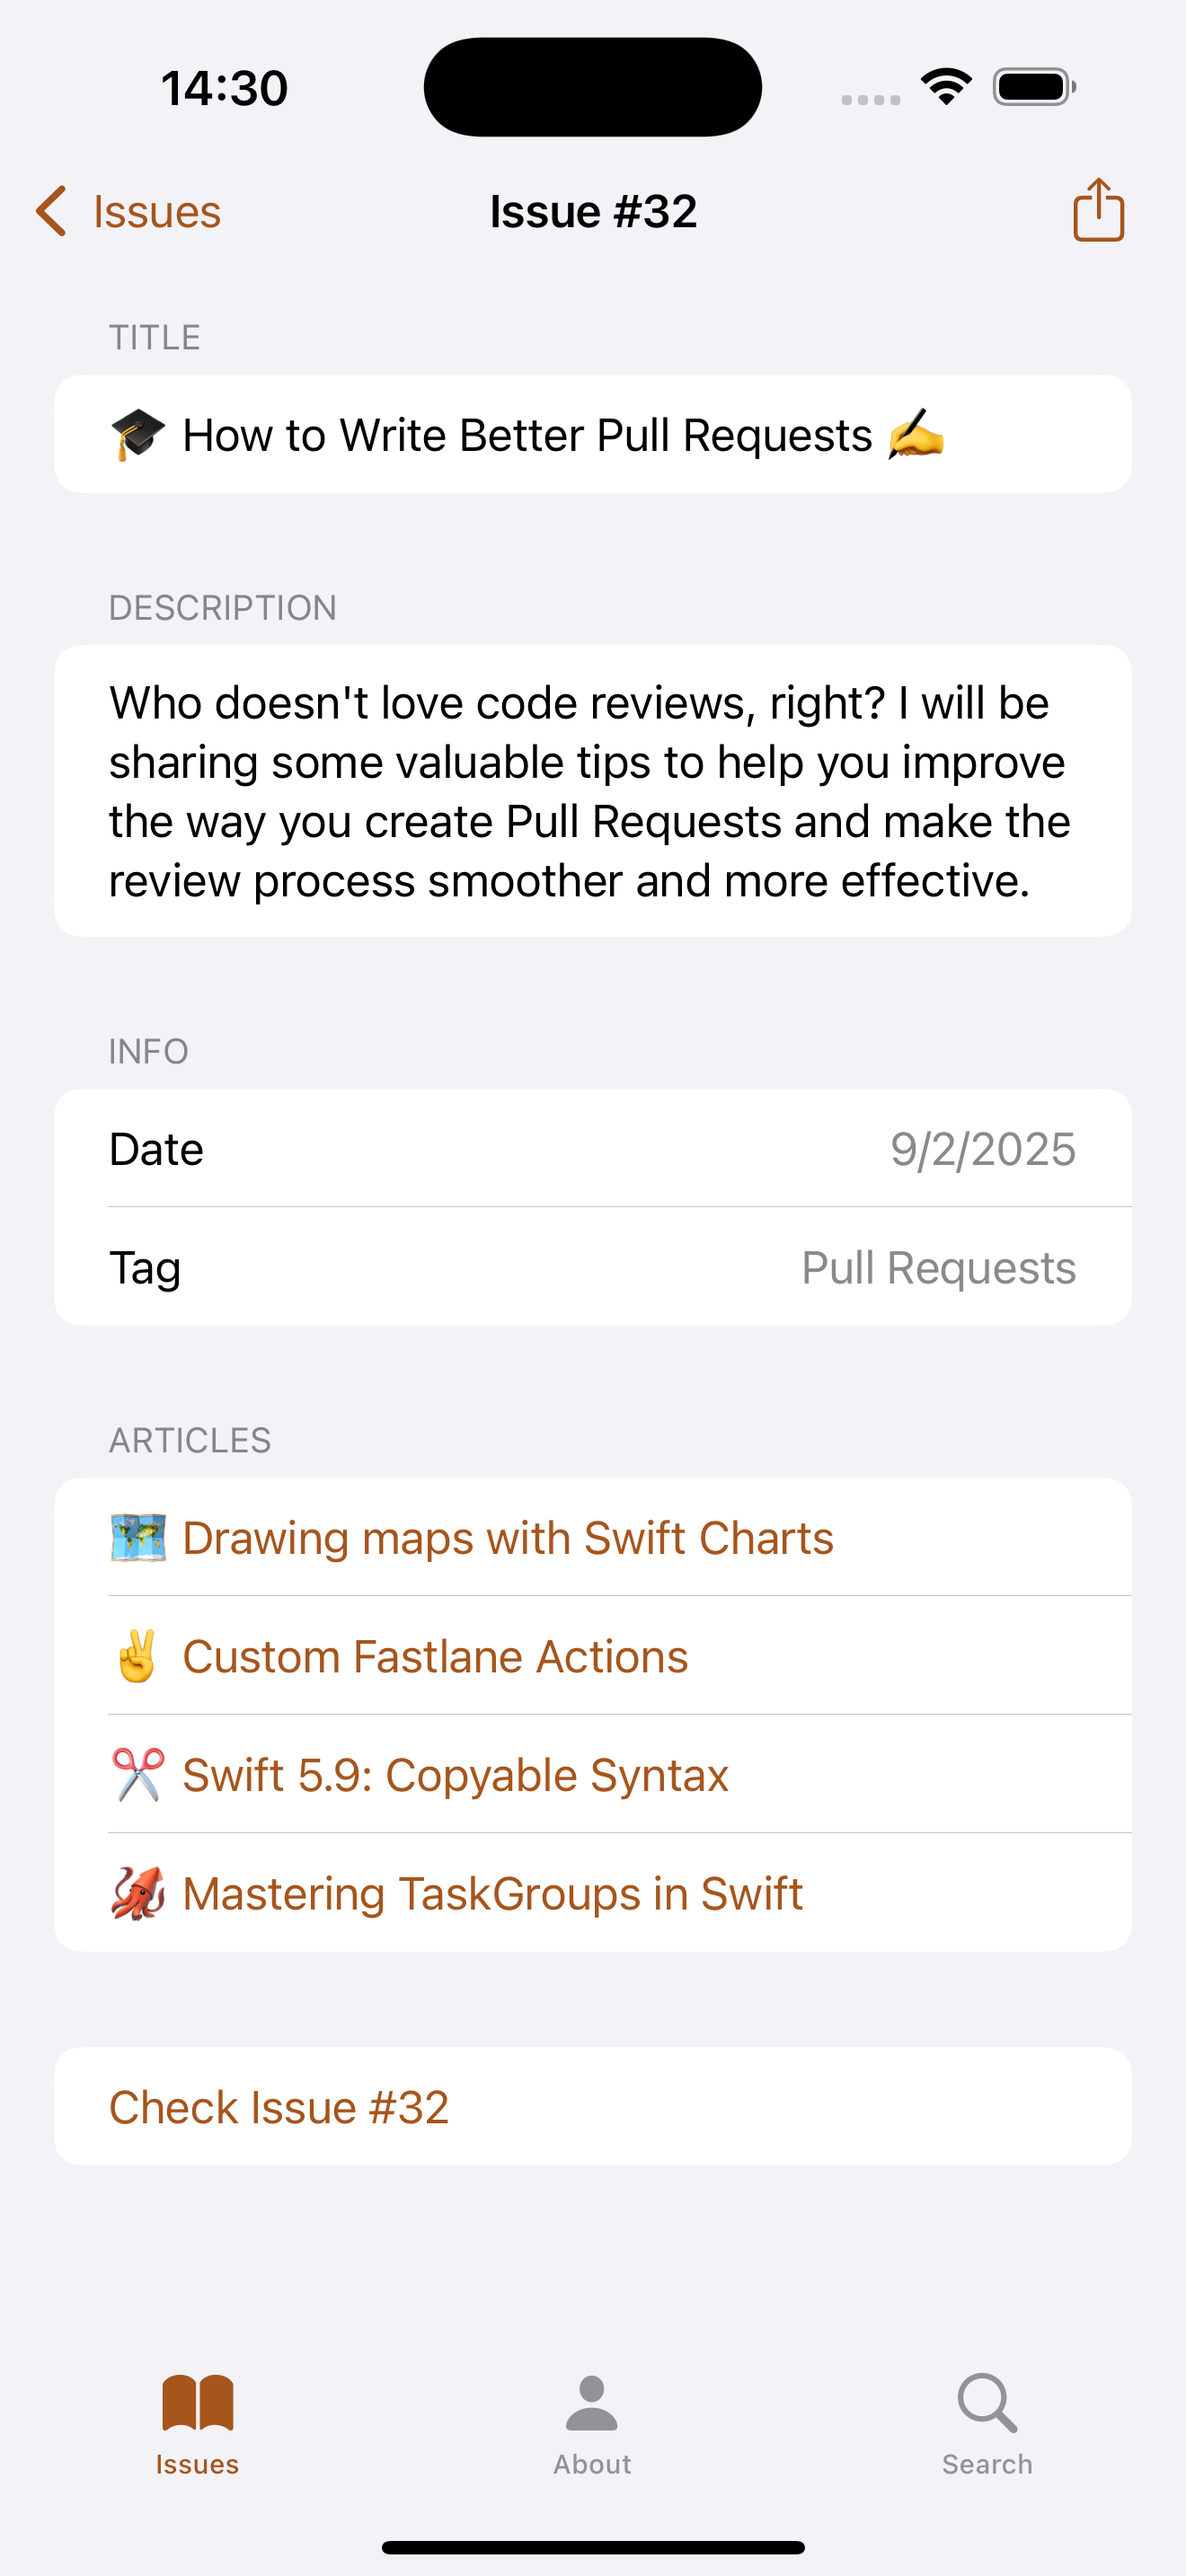
🧐 Sneak Peek: Issue View
I love clean and minimalist designs and I believe showing all the information in a list using sections and headers works perfectly. Here is a glimpse of what I am aiming for with the issue view.
The Plan
To build the detail view, here are the things I need to do:
- Create the
IssueViewusing mock data. - Allow users to open the issue in a web browser.
- Get the articles for a given issue.
- Add sharing functionality to let users share the content.
Implement the Issue Detail View
SwiftUI's list view supports sections and headers, similar to UITableView in UIKit. To organize and structure content, you can wrap items inside a Section, optionally including a header or footer.
To allow users to open an issue in a web browser, a Link component can be added, passing the issue's URL as a string.
struct IssueView: View {
    let issue: Issue

    var body: some View {
        List {
            Section("Title") {
                Text(issue.title)
            }

            Section("Description") {
                Text(issue.summary)
            }

            Section("Info") {
                LabeledContent("Date", value: issue.date.formatted(date: .numeric, time: .omitted))
                LabeledContent("Tag", value: issue.tags.joined(separator: ", "))
            }

            if let url = URL(string: issue.url) {
                Link(destination: url) {
                    Text("Check Issue #\(issue.id)")
                }
            }
        }
        .navigationTitle("Issue #\(issue.id)")
        .navigationBarTitleDisplayMode(.inline)
    }
}
Extracting Articles from an Issue
If you take a look at the newsletter API feed, you will notice that there is no direct articles property! So, how can we retrieve them?
The API provides content_html, which contains the issue's content in markdown format.
By parsing this HTML string, we can extract article links and title.
To achieve this, we need to scan the HTML, find all h2 elements and identify those containing a href attributes. For this, I have used the SwiftSoup library to efficiently scrape and parse the data.
Here is the code:
import SwiftSoup

class IssuesConverter {
    func map(from issue: Issue) -> Issue {
        guard let headers: Elements = try? SwiftSoup.parse(issue.content).select("h2")
        else { return issue }
        var copy = issue
        var articles = [Article]()
        for header in headers.array() {
            if let link: Element = try? header.select("a").first(),
               let title = try? link.text(),
               let url = try? link.attr("href") {
                articles.append(
                    Article(
                        title: title,
                        url: url
                    )
                )
            }
        }
        copy.articles = articles
        return copy
    }
}
Add Sharing Functionality
To allow users to share issue content easily, we can use the ShareLink component in SwiftUI. Simply pass the issue's URL as a parameter, and SwiftUI will handle the sharing options seamlessly for you.
struct IssueView: View {
    let issue: Issue

    var body: some View {
        List {
            [...]
        }
        .navigationTitle("Issue #\(issue.id)")
        .navigationBarTitleDisplayMode(.inline)
        .toolbar {
            ShareLink(item: URL(string: issue.url)!)
        }
    }
}
As you can see, you can wrap the ShareLink into a .toolbar component.
Navigating to the Issue View
The final step is setting up navigation to the IssueView, which is simple.
In IssuesView, use a NavigationLink component, passing IssueView as the destination.
struct IssuesView: View {
    [...]

    var body: some View {
        NavigationStack {
            Group {
                if vm.isLoading {
                    ProgressView()
                } else {
                    List(vm.issues) { issue in
                        NavigationLink {
                            IssueView(issue: issue)
                        } label: {
                            IssueRowView(issue: issue)
                        }
                    }
                }
            }
            .navigationTitle("Issues")

            [...]
        }
    }
}
🤝 Wrapping Up
With that, our issues detail view is now complete, allowing us to display information about a specific issue!
Next week, I will walk you through setting up push notifications for your app, using the iOS Coffee Break Newsletter application as an example. Stay tuned!
⚠️ Important Update
Newsletter subscribers will receive complimentary access to the project's source code. If you want to get the most out of this series, I highly recommend subscribing! 🤩
CURATED FROM THE COMMUNITY
🪟 Demystifying Picture in Picture on iOS
Adopting Picture in Picture (PiP) into a custom video player might appear straightforward at first, but if you have tried it yourself, you know that it turns out to be quite challenging!
In his latest article, Artem walks you through enabling Picture in Picture mode on iOS, beginning with a UIKit-based setup.
🤔 Sheets Manipulation
How do you manage sheets in your SwiftUI application?
Manu's latest article discusses which approach suits different situations best, enum-based vs boolean-based sheet manipulation.
🌍 Localization - Pluralizations
How do you handle String Pluralization in your app?
If you didn't know, String Catalogs come with built-in pluralization support — making it a much simpler and faster alternative to the old method using strings and stringsdict files. Some weeks ago, Manu's published an article that walks you through how to handle plurals using String Catalogs.
🧘♂️ Parallelize Unit Tests in Your iOS App
Noam's latest article explores two different approaches for running unit tests in your iOS application: one with the Xcode command-line tools and Bash and the other using Fastlane. Each method comes with its own advantages and drawbacks so you can choose the one that aligns best with your development process!
📜 Automate Release Notes Updates with Codemagic CI/CD
Do you find it a bit tiresome to repeatedly type out the same release notes each time you submit your app for review?
In this article, Masaki Sato from the Codemagic team shares a way to streamline that process by automatically uploading your release notes along with your app submissions to the stores.