🏄🏻♂️ Getting Started with Rive in SwiftUI
Overview
This tutorial covers how to get started with Rive's Apple runtime library, integrate it into your app, configure a RiveViewModel inside a SwiftUI view, and sync Rive State Machines with SwiftUI state.
Rive's runtime libraries are open-source, and their source code can be found on GitHub. You can install the runtime using either Cocoapods or Swift Package Manager. The minimum supported iOS version is 14.0, and for macOS, it is 13.1.
One of Rive's major strengths is access to a wide range of community-created assets. For common resources like icons or loading animations that aren't typically custom-built, you can explore the Rive Community.
The tree animation featured in this guide can be found here.
Adding Rive to Your Apple App
To install it using Swift Package Manager, open File > Add Packages in Xcode.
In the dialog that appears, paste the following URL into the package URL field.
$ https://github.com/rive-app/rive-iosIf your project still relies on CocoaPods, Rive continues to offer support for that as well. You can find more information here.
Configuring a RiveViewModel within a SwiftUI View
RiveViewModels act as the main interface for interacting with the RiveRuntime.
They serve as a link between your Rive file and the visual content that appears in your app.
Below is an example of how to create one within a SwiftUI view:
import RiveRuntime

struct AnimatedTreeView: View {
    @StateObject private var tree = RiveViewModel(
        fileName: "tree"
    )

    [...]
}
Working with State Machines
Rive really shines when it comes to state-driven animations. You can design complex animation flows and transition smoothly between different states. In addition to toggling booleans, you can also pass numerical values as inputs.
Make sure that the stateMachineName property exactly matches the name defined in the Rive editor. If it doesn't, your changes won't be visible, trust me on this one!
Here is the same example as before, but this time we include the state machine name in the RiveViewModel initializer.
import RiveRuntime

struct AnimatedTreeView: View {
    @StateObject private var tree = RiveViewModel(
        fileName: "tree",
        stateMachineName: "State Machine 1"
    )

    [...]
}
Working with Animated Assets
First, we need to import RiveRuntime.
This allows us to display Rive animations as regular views within the app.
To render it as a view, we just need to call .view() on the RiveViewModel.
import RiveRuntime
struct AnimatedTreeView: View {
@State var age: Double = 18.0
// MARK: ViewModels
@StateObject private var tree = RiveViewModel(
fileName: "tree",
stateMachineName: "State Machine 1"
)
var body: some View {
NavigationStack {
VStack {
tree.view()
[...]
}
[...]
}
}
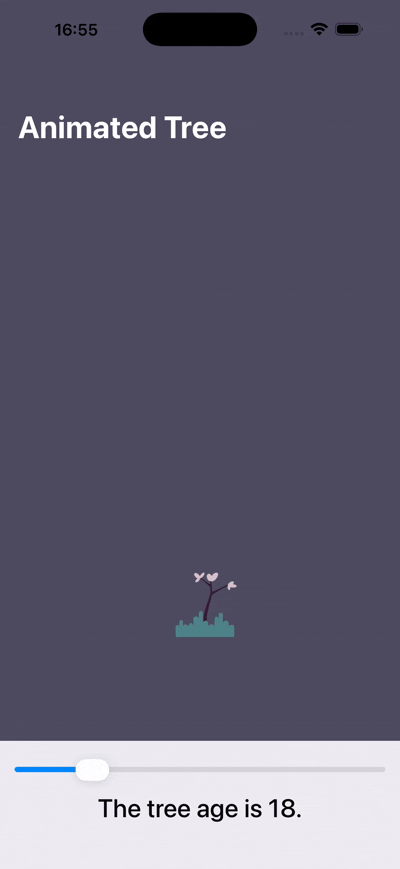
}We can make the animation interactive by adding a Slider. In this example, moving the slider adjusts the age of the tree.
To update the state machine dynamically, we need to use the setInput method on the RiveViewModel instance, providing both the input name and its value.
Here is how it can be done:
struct AnimatedTreeView: View {
    [...]

    var body: some View {
        NavigationStack {
            VStack {
                tree.view()

                VStack {
                    Slider(
                        value: $age,
                        in: 0...100,
                        onEditingChanged: { _ in
                            // triggering a change in the state machine
                            tree.setInput("input", value: age)
                        }
                    )

                    Text("The tree age is \(Int(age)).")
                }
            }

            [...]
        }
    }
}
Here is a look at how the demo app I created for this version works:
In case you are interested in the source code, feel free to check out the repository.
🤝 Wrapping Up
In this guide, we explored how to get started with Rive's Apple runtime library by creating an simple animated app using SwiftUI.
In the following chapter, we'll migrate this app to UIKit and explore how to keep Rive State Machines in sync with UIKit state.