👨🚀 Setting Up and Sending Remote Push Notifications 🔔

Forget about Ruby and Fastlane installation issues!
Discover Codemagic CLI Tools - the free, open-source Fastlane alternative for automating iOS builds, code signing and publishing.
This message is brought to you by a sponsor who helps keep this content free for everyone. If you have a moment, check them out. Your support means a lot!
Welcome to issue #44 of the iOS Coffee Break Newsletter 📬. Can you believe this is already the 7th edition of the "Building a Newsletter App" series? 😲 The journey isn't over yet - I still have plenty of features I would love to add!
Last week, I guided you on the implementation of the issue detail page and how I handled navigation between screens.
And this week I ask you: What is the point of an iOS Newsletter app if no one knows about new issues? If only there were a way to notify users when fresh content is available... 🤭
That's right! This week, I am setting up push notifications for my newsletter app 🚀. This is a must-have feature for an application of this kind, so I must confess I was looking forward to implement it!
In this post, I will walk through how to set up your app to receive push notifications and show how you can configure a provider to send notifications for you. Ready or not, Let's get this done!
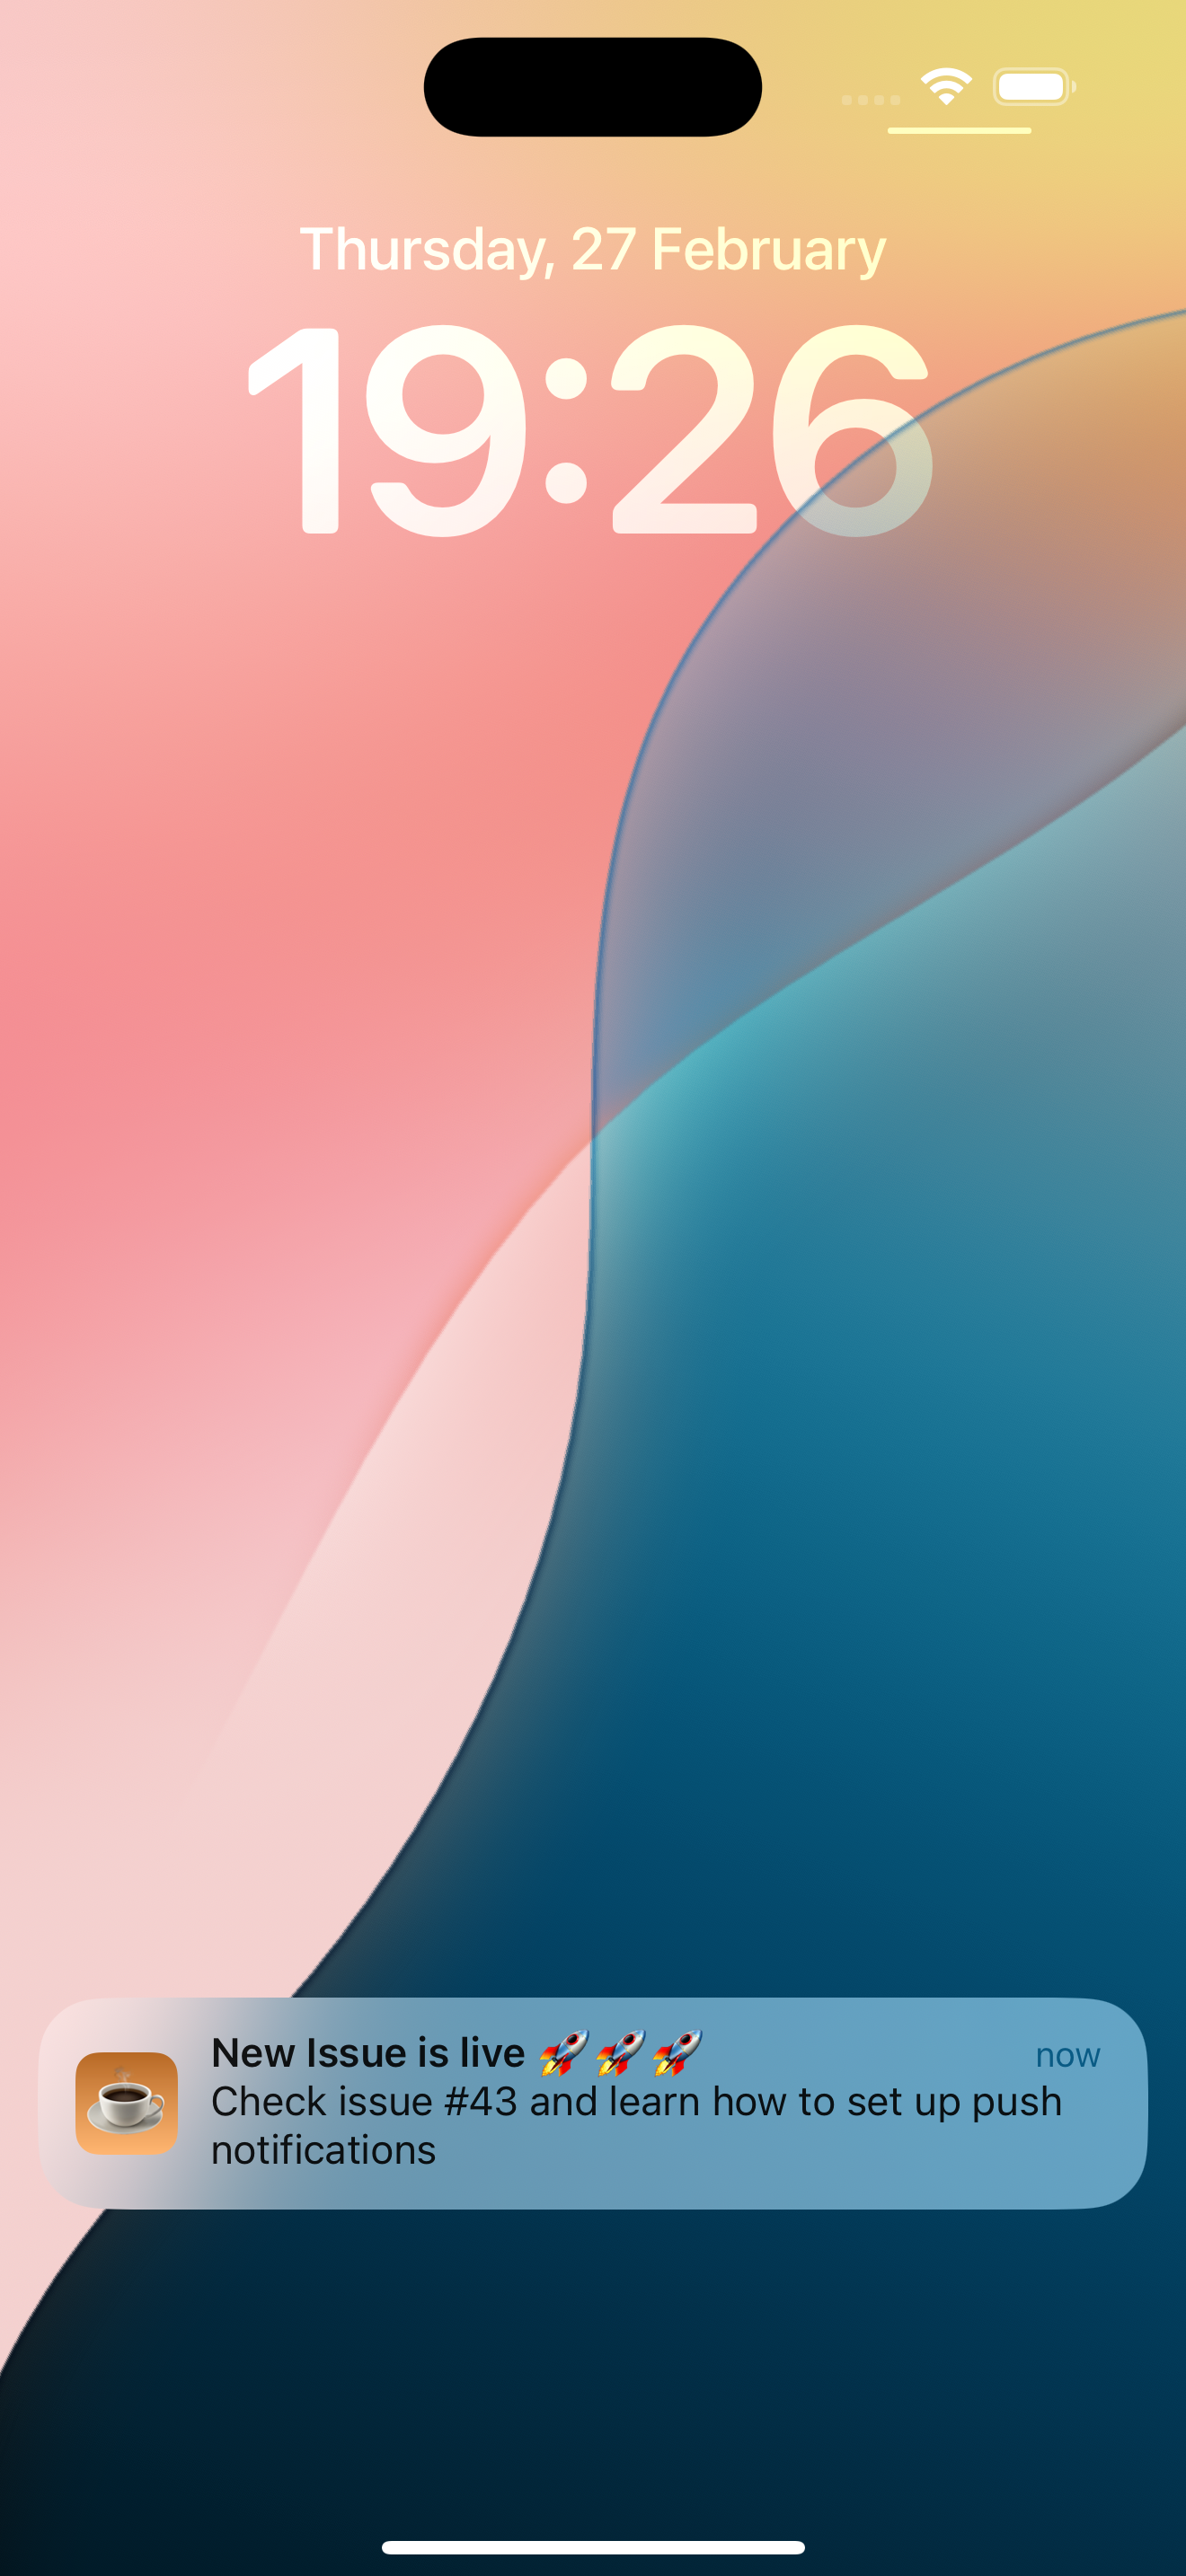
🧐 Sneak Peek: Receiving Push Notifications
Here is a glimpse of what I am aiming for — enabling push notifications for the app!
The Plan
The goal is simple — get my newsletter app ready for push notifications. Here is the plan:
- Request user permission to send notifications.
- Registering for push notifications.
- Set up a remote notification provider.
Requesting User Permission to Send Notifications
Before displaying alerts on a user's device, we must first ask their permission. This can be done by requesting authorization with the following code:
import UserNotifications

@Observable
class NotificationsManager {
    private(set) var hasPermission: Bool = false

    @MainActor
    func request() async {
        do {
            self.hasPermission = try await UNUserNotificationCenter
                .current()
                .requestAuthorization(options: [.alert, .badge, .sound])
        } catch {
            print("you can handle the error here.")
        }
    }
}
The system prompts us to allow or deny the request only the first time - any subsequent requests won't trigger the prompt again. Once we give permission, we can proceed with registering the app to receive remote push notifications.
Registering for Remote Push Notifications
We must register for remote push notifications in order to obtain the device token from APNs.
In a SwiftUI app, you can do this by creating a new file called AppDelegate.swift, define a class that conforms to UIApplicationDelegate, and implement the application(_:didFinishLaunchingWithOptions:) method.
import UserNotifications

class AppDelegate: NSObject, UIApplicationDelegate, ObservableObject {
    func application(
        _ application: UIApplication,
        didFinishLaunchingWithOptions launchOptions: [UIApplication.LaunchOptionsKey : Any]? = nil
    ) -> Bool {
        // register to receive remote notifications
        application.registerForRemoteNotifications()

        UNUserNotificationCenter.current().delegate = self
        return true
    }
}

extension AppDelegate: UNUserNotificationCenterDelegate {
    func userNotificationCenter(
        _ center: UNUserNotificationCenter,
        didReceive response: UNNotificationResponse
    ) async {
        print("You can interact with your notification here.")
    }
}
To connect the app delegate to the SwiftUI app lifecycle, we need to use the UIApplicationDelegateAdaptor property wrapper. Here is how you can do it:
import SwiftUI

@main
struct iOSCoffeeBreakApp: App {
    @UIApplicationDelegateAdaptor(AppDelegate.self) private var appDelegate

    var body: some Scene {
        WindowGroup {
            AppView()
        }
    }
}
Configuring a Remote Notifications Provider
There are multiple options available for handling push notifications, including building your own provider. However, I chose Firebase because it is free, reliable, and easy to integrate. Firebase Cloud Messaging (FCM) is the feature that enables push notifications.
Here is how to set up remote notifications and integrate Firebase into your app:
- Enable the Push Notifications capability in Xcode
- Create a project in the Firebase console
- Register an iOS App to your project
- Add the Firebase SDK
- Select the
FirebaseMessagingmodule from thefirebase-ios-sdkpackage
In order to work with remote notifications you need to enroll in the Apple Developer Program.
Setting Up Firebase SDK
Here is how we can set up Firebase in our application's AppDelegate:
[...]
import FirebaseCore
class AppDelegate: NSObject, UIApplicationDelegate, ObservableObject {
func application(
_ application: UIApplication,
didFinishLaunchingWithOptions launchOptions: [UIApplication.LaunchOptionsKey : Any]? = nil
) -> Bool {
FirebaseApp.configure()
[...]
return true
}
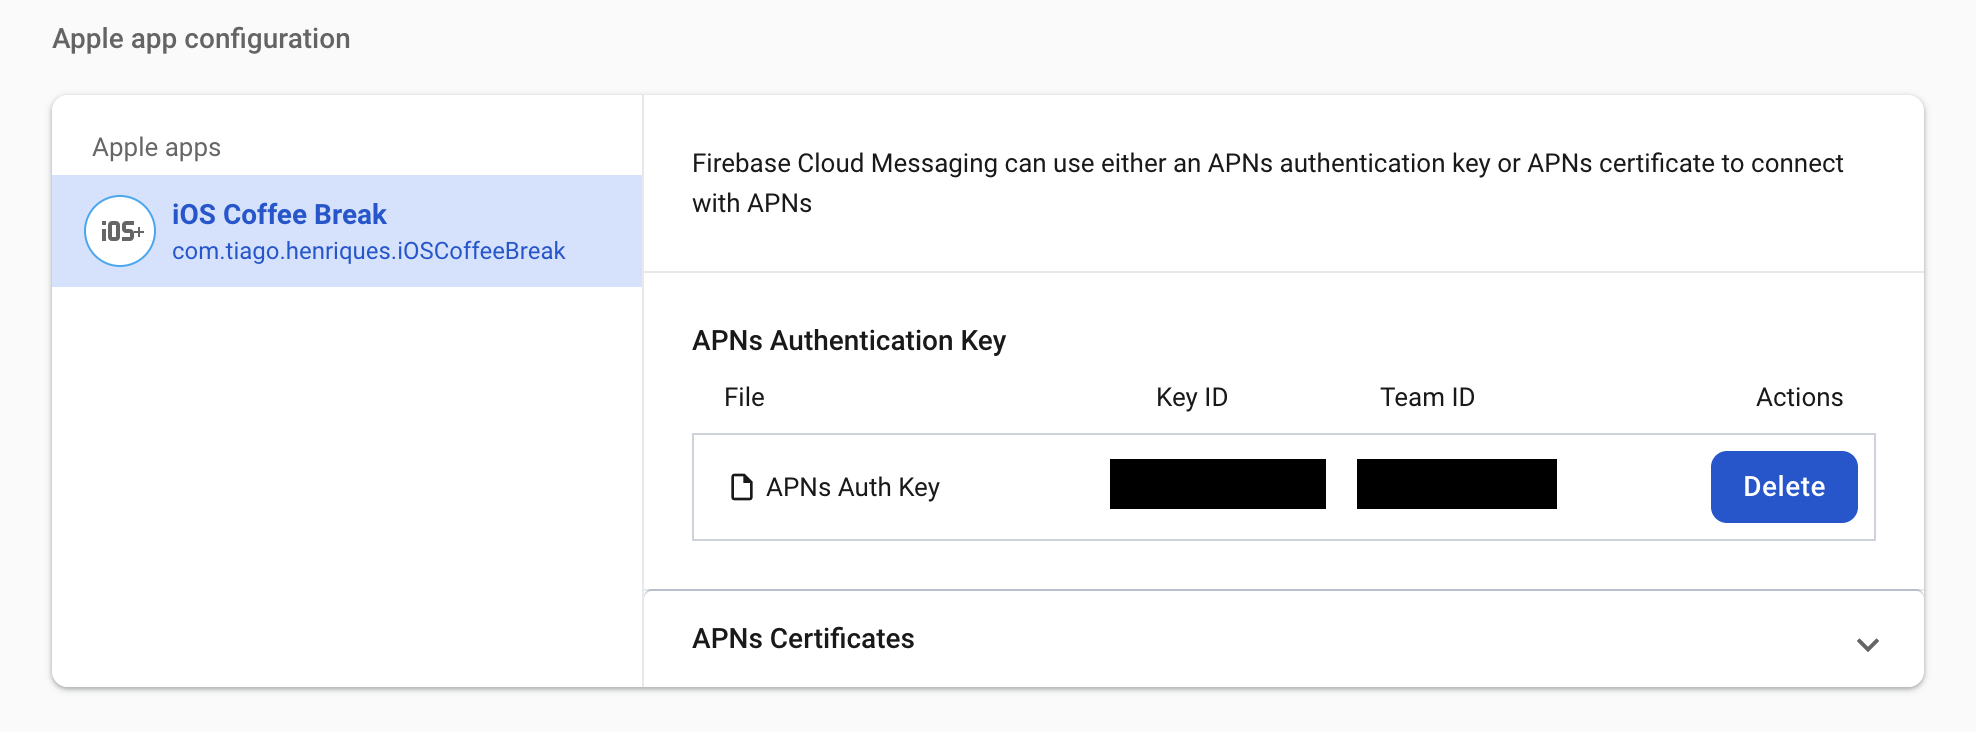
}Configuring an APNs Authentication Key
To receive remote notifications on a device, our Firebase project needs to be configured with an authentication key or certificate. I am using an APNs authentication key since it doesn't expire and works indefinitely after being uploaded.
If you don't know how to create an APNs authentication key, here is one way to do it.
Once the key is created, configure it in Firebase under Project Settings > Cloud Messaging > Apple app configuration, then upload the key.
Setting Up Firebase Cloud Messaging
In order to configure our project to work with Firebase Cloud Messaging, we need to set up the messaging delegate:
[...]
import FirebaseMessaging

class AppDelegate: NSObject, UIApplicationDelegate, ObservableObject {
    func application(
        _ application: UIApplication,
        didFinishLaunchingWithOptions launchOptions: [UIApplication.LaunchOptionsKey : Any]? = nil
    ) -> Bool {
        [...]

        Messaging.messaging().delegate = self

        return true
    }
}
Next, we need to implement the Firebase MessagingDelegate protocol. This step is essential to connect our app with Firebase by sending the device token to Firebase's backend, enabling it to deliver notifications to the device.
extension AppDelegate: MessagingDelegate {
    func application(
        _ application: UIApplication,
        didRegisterForRemoteNotificationsWithDeviceToken deviceToken: Data
    ) {
        Messaging.messaging().apnsToken = deviceToken
    }
}
Remote notifications don't work on the simulator. You need an actual device to test them.
In order to test push notifications on a single device, we need to get the FCM registration token from our device. Here is how you can do that:
extension AppDelegate: MessagingDelegate {
[...]
func messaging(
_ messaging: Messaging,
didReceiveRegistrationToken fcmToken: String?
) {
#if DEBUG
print("🚨 FCM Token: \(fcmToken)")
#endif
}
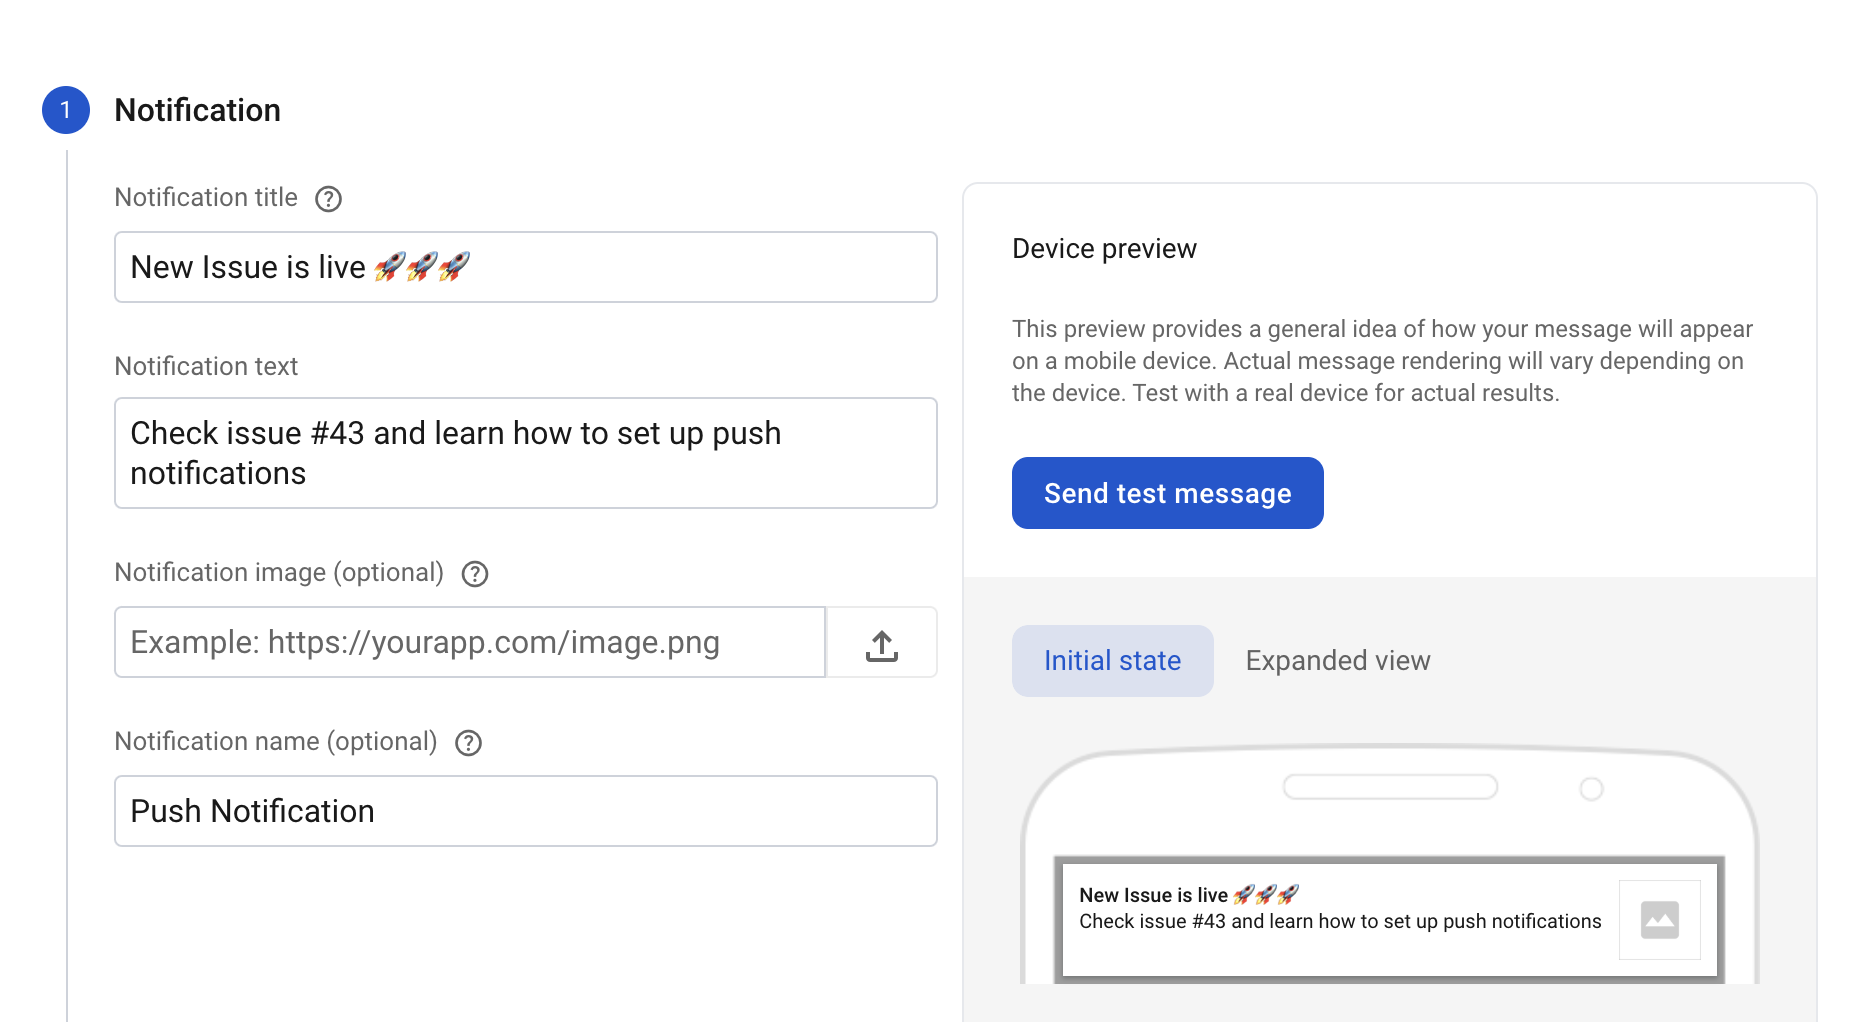
}Now, to create and send notifications from Firebase, just go to your Firebase console, select Messaging and then create a new push notification campaign like this:
🤝 Wrapping Up
Uff 🥵! I hope that was not a lot to follow! But with that, I have showed you how you can set up and send push notifications from Firebase to your app using my newsletter app as example.
Next week, I will be diving into handling background deep links from push notifications and navigating users directly to specific screens. Stay tuned!
⚠️ Important Update
Newsletter subscribers will receive complimentary access to the project's source code. If you want to get the most out of this series, I highly recommend subscribing! 🤩