🚖 Handling Deep Links from Push Notifications in SwiftUI 🔔

Try the all NEW RevenueCat Paywalls builder today!
Try the beta for the new highly flexible, natively rendering Paywall UI framework from RevenueCat. With RevenueCat Paywalls you can remotely configure and edit your entire paywall view without waiting on App Review.
This message is brought to you by a sponsor who helps keep this content free for everyone. If you have a moment, check them out. Your support means a lot!
Welcome to issue #45 of the iOS Coffee Break Newsletter 📬 and to the 8th edition of the "Building a Newsletter App" series.
Last week, I walked you through integrating push notifications into my newsletter app and configured a provider to send them!
This week, I am taking things further by handling deep linking from notifications. I will show you how to direct users to a specific screen when they tap a notification. By default, the app opens on the initial screen, but I want users to land on the latest issue instead - let's make that happen today!
🧐 Sneak Peek: Handling Deep Links
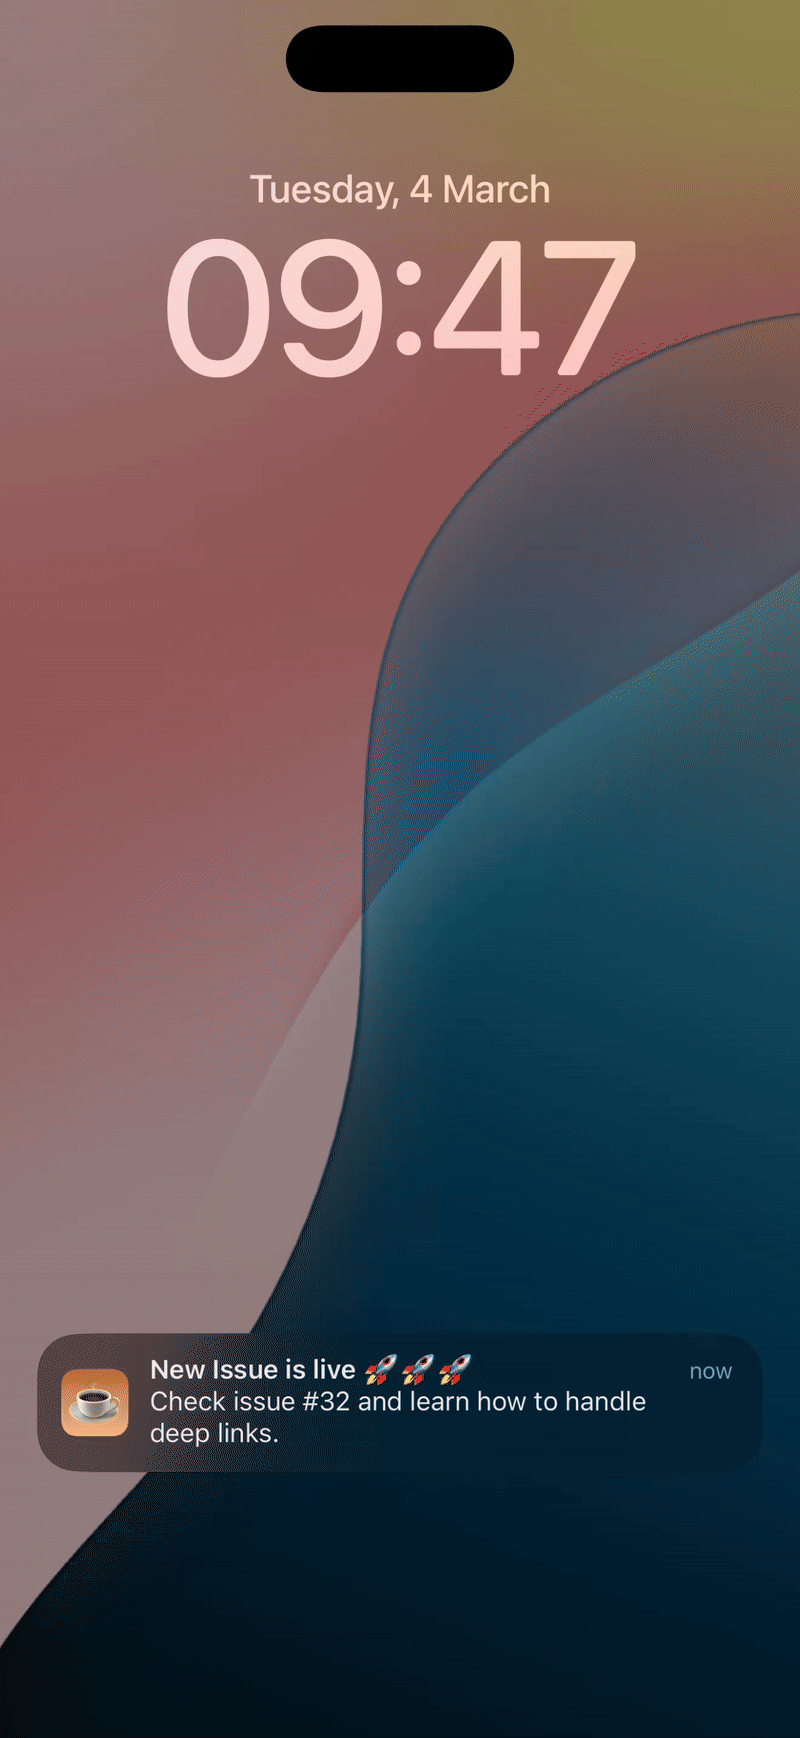
Here is a glimpse of what I am aiming for - handling deep links from push notifications!
The Plan
The goal is simple - handle a deep link when I click on a notification. Here is the plan:
- Configure a custom URL type
- Understand how to create an Apple notification JSON payload
- Get the data from the notification
- Link the app's entry point with the AppDelegate
- Handle deep links from the notification JSON payload
Configuring a custom URL Type
To set up deep links within our Xcode project, we need to configure a custom URL scheme.
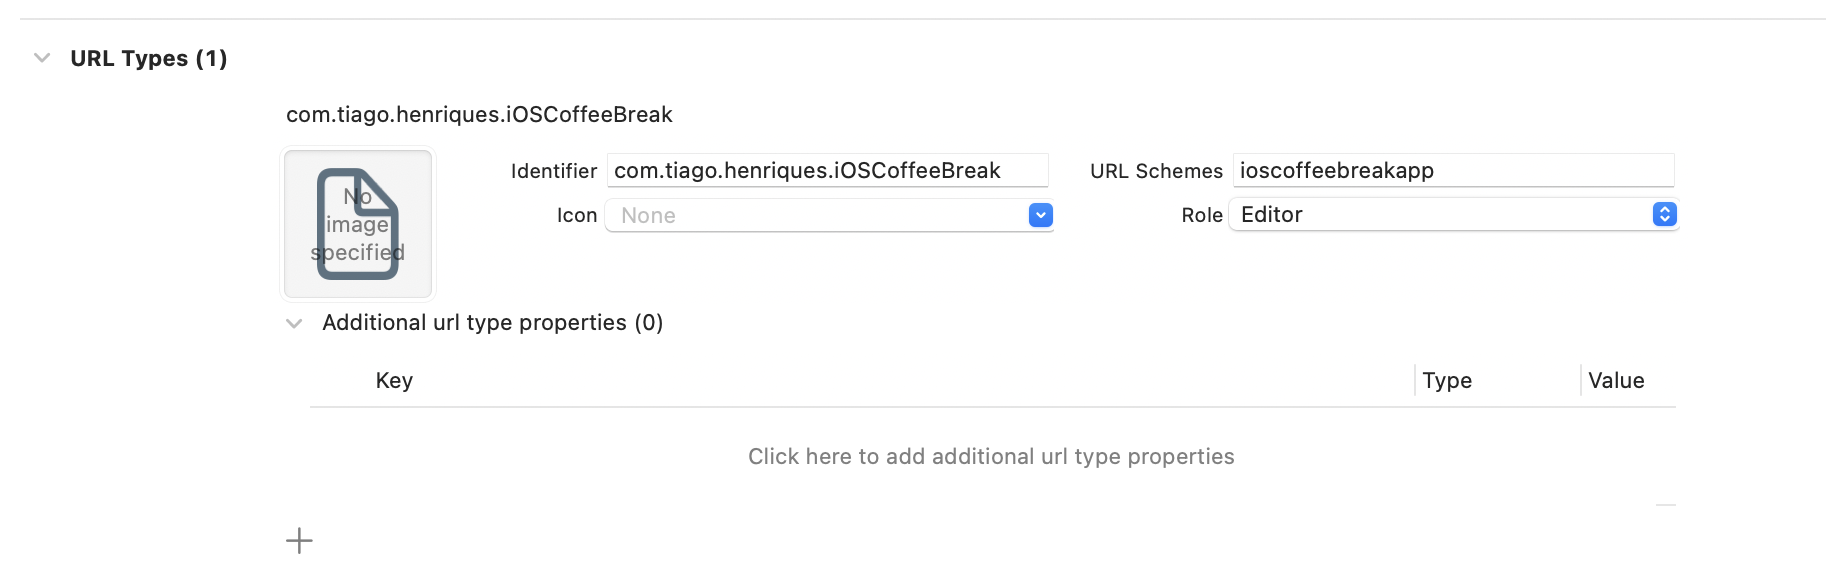
To do that, click on your project > Info Tab > Select URL types > click the "+" icon.
Here, we need to fill the identifier and the URL scheme fields.
The identifier corresponds to your app bundle identifier and the URL schemes is essentially the host part of your app that this is going to listen to and it can be a string you choose.
In my case, I am going with ioscoffeebreakapp as my URL scheme.
Here is my configuration as example:
Creating the JSON payload
Here is how you can create an Apple notification JSON payload:
{
    "aps" : {
       "alert" : {
            "title" : "New Issue is live 🚀🚀🚀",
            "body" : "Check issue #45 and learn how to handle deep links."
        },
        "sound" : "default"
   },
    "link": "ioscoffeebreakapp://issue?id=45"
}
For more information, check Apple's official documentation on how to generate a remote notification.
You can create custom keys such as my "link" property in the example above.
I am particularly interested in providing this custom key as this property tells my application what screen it should navigate to.
Here I am setting the entire deep link custom URL scheme as well as the query parameters that it expects.
Note that custom keys need to be outside of the
"aps"object.
Getting the Data from the Notification Payload
Whenever we interact with a push notification, we can extract some data from it.
To get the data from the JSON payload, we need to parse the userInfo dictionary from the notification content attribute.
In here, we are particularly interested in the "link" property, where we will pass the deep link information.
Here is how we can do it:
extension AppDelegate: UNUserNotificationCenterDelegate {

    func userNotificationCenter(
        _ center: UNUserNotificationCenter,
        didReceive response: UNNotificationResponse
    ) async {
        if let deepLink = response.notification.request.content.userInfo["link"] as? String,
           let url = URL(string: deepLink) {
            print("🔔 deep link: \(deepLink)")
            // handle deep link here.
        }
    }

    [...]
}
Linking the App's entry point with the AppDelegate
To link some of the functions from our SwiftUI app to our AppDelegate, we can create a property to assign our app to it.
Here is one way to do it:
class AppDelegate: NSObject, UIApplicationDelegate, ObservableObject {
    var app: iOSCoffeeBreakApp?

    [...]
}
Next, in our app entry point, we can assign the app reference to the AppDelegate in the onAppear method for example.
@main
struct iOSCoffeeBreakApp: App {
    @UIApplicationDelegateAdaptor(AppDelegate.self) private var appDelegate
    @State private var tabsCoordinator = TabsCoordinator()

    var body: some Scene {
        WindowGroup {
            AppView()
                .environment(tabsCoordinator)
                .onAppear {
                    appDelegate.app = self
                }

                [...]
        }
    }
}
Handling Deep Links from the JSON Payload
Now that we have a link between the two, we can handle deep links from the userNotificationCenter(_ center: UNUserNotificationCenter, didReceive response: UNNotificationResponse) method.
extension AppDelegate: UNUserNotificationCenterDelegate {

    func userNotificationCenter(
        _ center: UNUserNotificationCenter,
        didReceive response: UNNotificationResponse
    ) async {
        if let deepLink = response.notification.request.content.userInfo["link"] as? String,
           let url = URL(string: deepLink) {
            print("🔔 deep link: \(deepLink)")
            app?.handleDeeplink(from: url)
        }
    }

    [...]
}
The handleDeepLink method is defined at the app's entry point and is in charge for taking the user to the correct screen.
I will not cover the details of the TabsCoordinator in this issue but if you want to know more about how you can integrate the Coordinator Pattern into your SwiftUI Apps, I have the right article for you!
extension iOSCoffeeBreakApp {
    func handleDeeplink(from url: URL) {
        print("🔔 url: \(url)")
        let routeFinder = RouteFinder()
        if let route = routeFinder.findIssueRoute(from: url) {
            // switch to .issues tab
            tabsCoordinator.switchToTab(.issues)
            // push to route
            tabsCoordinator
                .issuesCoordinator
                .coordinator
                .push(route)
        }
    }
}
🤝 Wrapping Up
And that wraps up my guide on handling deep links using my newsletter app as an example!
Next week, I will dive into app localization, giving you an overview of Xcode's String Catalogs and how they simplify the process. Stay tuned for more!