🤖 Automating Swift Binary Releases Using GitHub Actions 📦

Forget about Ruby and Fastlane installation issues!
Discover Codemagic CLI Tools - the free, open-source Fastlane alternative for automating iOS builds, code signing and publishing.
This message is brought to you by a sponsor who helps keep this content free for everyone. If you have a moment, check them out. Your support means a lot!
Welcome to issue #58 of the iOS Coffee Break Newsletter 📬.
In last week's edition, I shared a Swift CLI tool that generates mock data from a Swift struct 🛠.
This week, I explored ways to automate the release pipeline for that command-line utility using GitHub Actions.
Although the project isn't open-sourced yet, it is worth noting that GitHub provides unlimited free CI/CD minutes for public repositories, making it an ideal choice for open-source development workflows 🤩.
The Plan
For this edition, I wanted to automate the release process of my dummy generator tool. The goal is to write a GitHub workflow that:
- Triggers automatically upon pushing a new tag in the repository.
- Compiles and compresses the binary on a macOS runner.
- Uploads the resulting executable to the release page.
Setting Up the Release Workflow
To get started with GitHub Actions, we will need to create a new workflow file inside our repo's .github/workflows directory.
$ mkdir -p .github/workflows
$ touch .github/workflows/release.yml
Writing the GitHub Workflow Action
The next step is to define our workflow:
name: Create Mac Release

on:
  push:
    # Sequence of patterns matched against refs/tags
    tags:
      - 'v*' # Push events to matching v*, i.e. v1.0, v20.15.10

jobs:
  release-macos:
    name: Release macOS Executable
    runs-on: macos-15

    steps:
      - name: Checkout
        uses: actions/checkout@v4
      - name: Build executable for release
        run: swift build -c release --arch arm64 --arch x86_64 --product SwiftDummyGen
      - name: Compress executable
        run: |
          BUILD_PATH=$(swift build -c release --arch arm64 --arch x86_64 --product SwiftDummyGen --show-bin-path)
          cp "$BUILD_PATH/SwiftDummyGen" SwiftDummyGen
          tar -czf ${{ github.ref_name }}.tar.gz -c SwiftDummyGen
      - name: Upload binaries to release
        uses: svenstaro/upload-release-action@v2
        with:
          repo_token: ${{ secrets.GITHUB_TOKEN }}
          file: ${{ github.ref_name }}.tar.gz
          tag: ${{ github.ref }}
          overwrite: true
Here is a breakdown of what is happening behind the scenes:
- We have configured the workflow to trigger on push events, specifically when a version tag following the pattern
(v*.*.*)is pushed to the repository. - To make the tool available for use, it needs to be compiled for the desired platforms. In this case, both macOS arm64 and x86_64.
- After building the binaries, we set up a GitHub release that uses the pushed tag as its identifier and included a compressed archive containing the compiled binaries.
- As illustrated in the workflow above, we can use svenstaro's upload-release-action to generate the release on GitHub.
- Be sure to commit this workflow file to your repository so it can run properly.
Adding Permissions to the Workflow
Before running the workflow, there is an important detail. In order to commit changes, the workflow needs to have write access.
To enable it, go to the repository settings, and under Actions, look for Workflow Permissions. Then, select Read and Write Permissions, and save it.

Set write permissions to the GitHub action.
Tagging a Release
We can create and push a new version tag directly from the terminal by running the following commands:
$ git tag v1.0.0
$ git tag
$ git push origin v1.0.0
Executing the Workflow
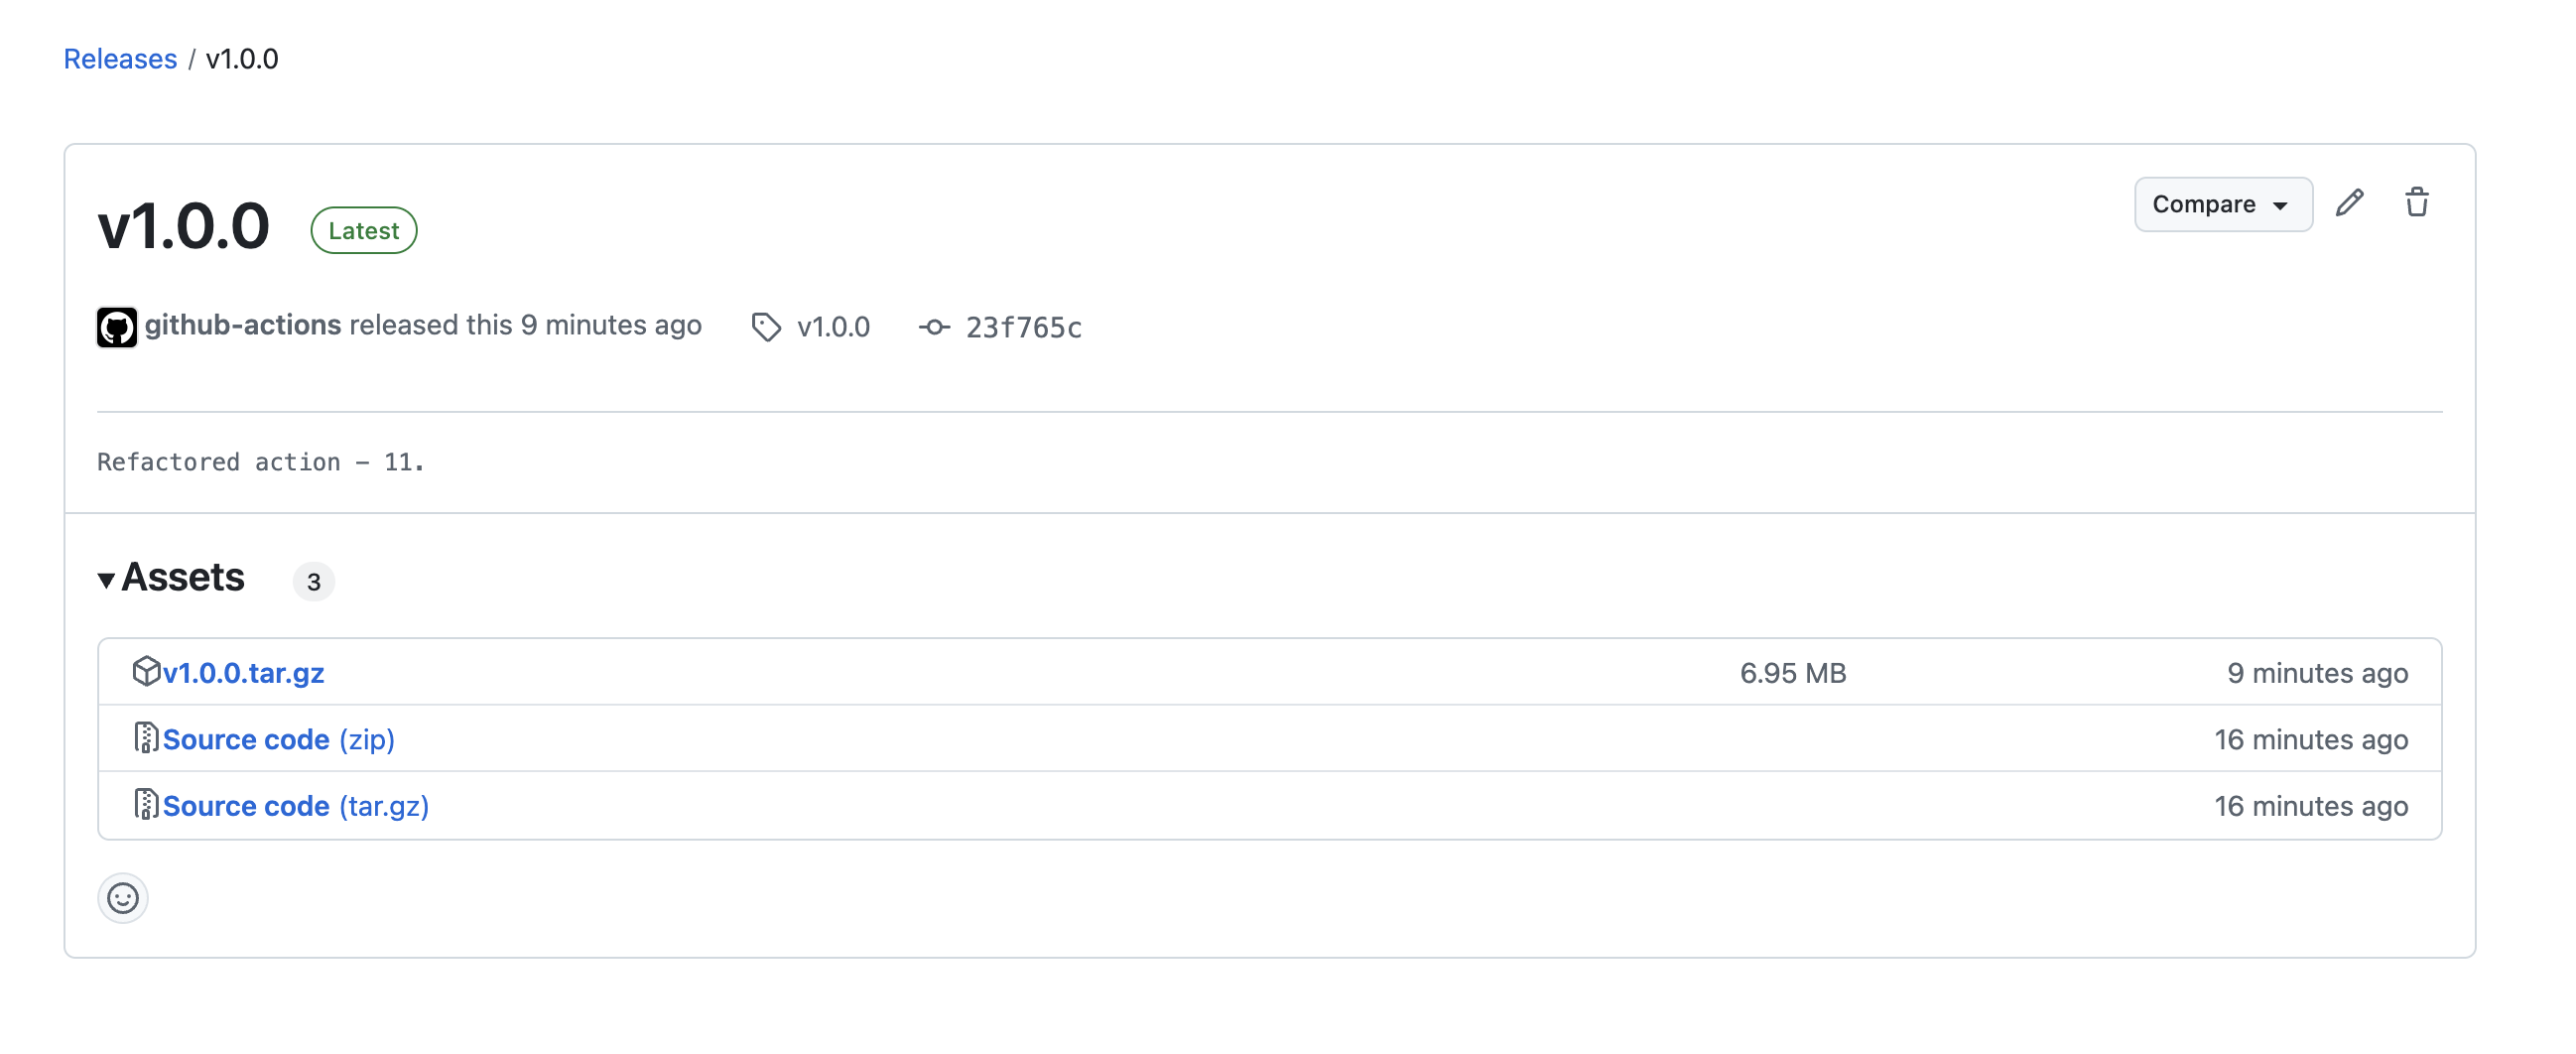
After a few moments, the workflow completes its run successfully!
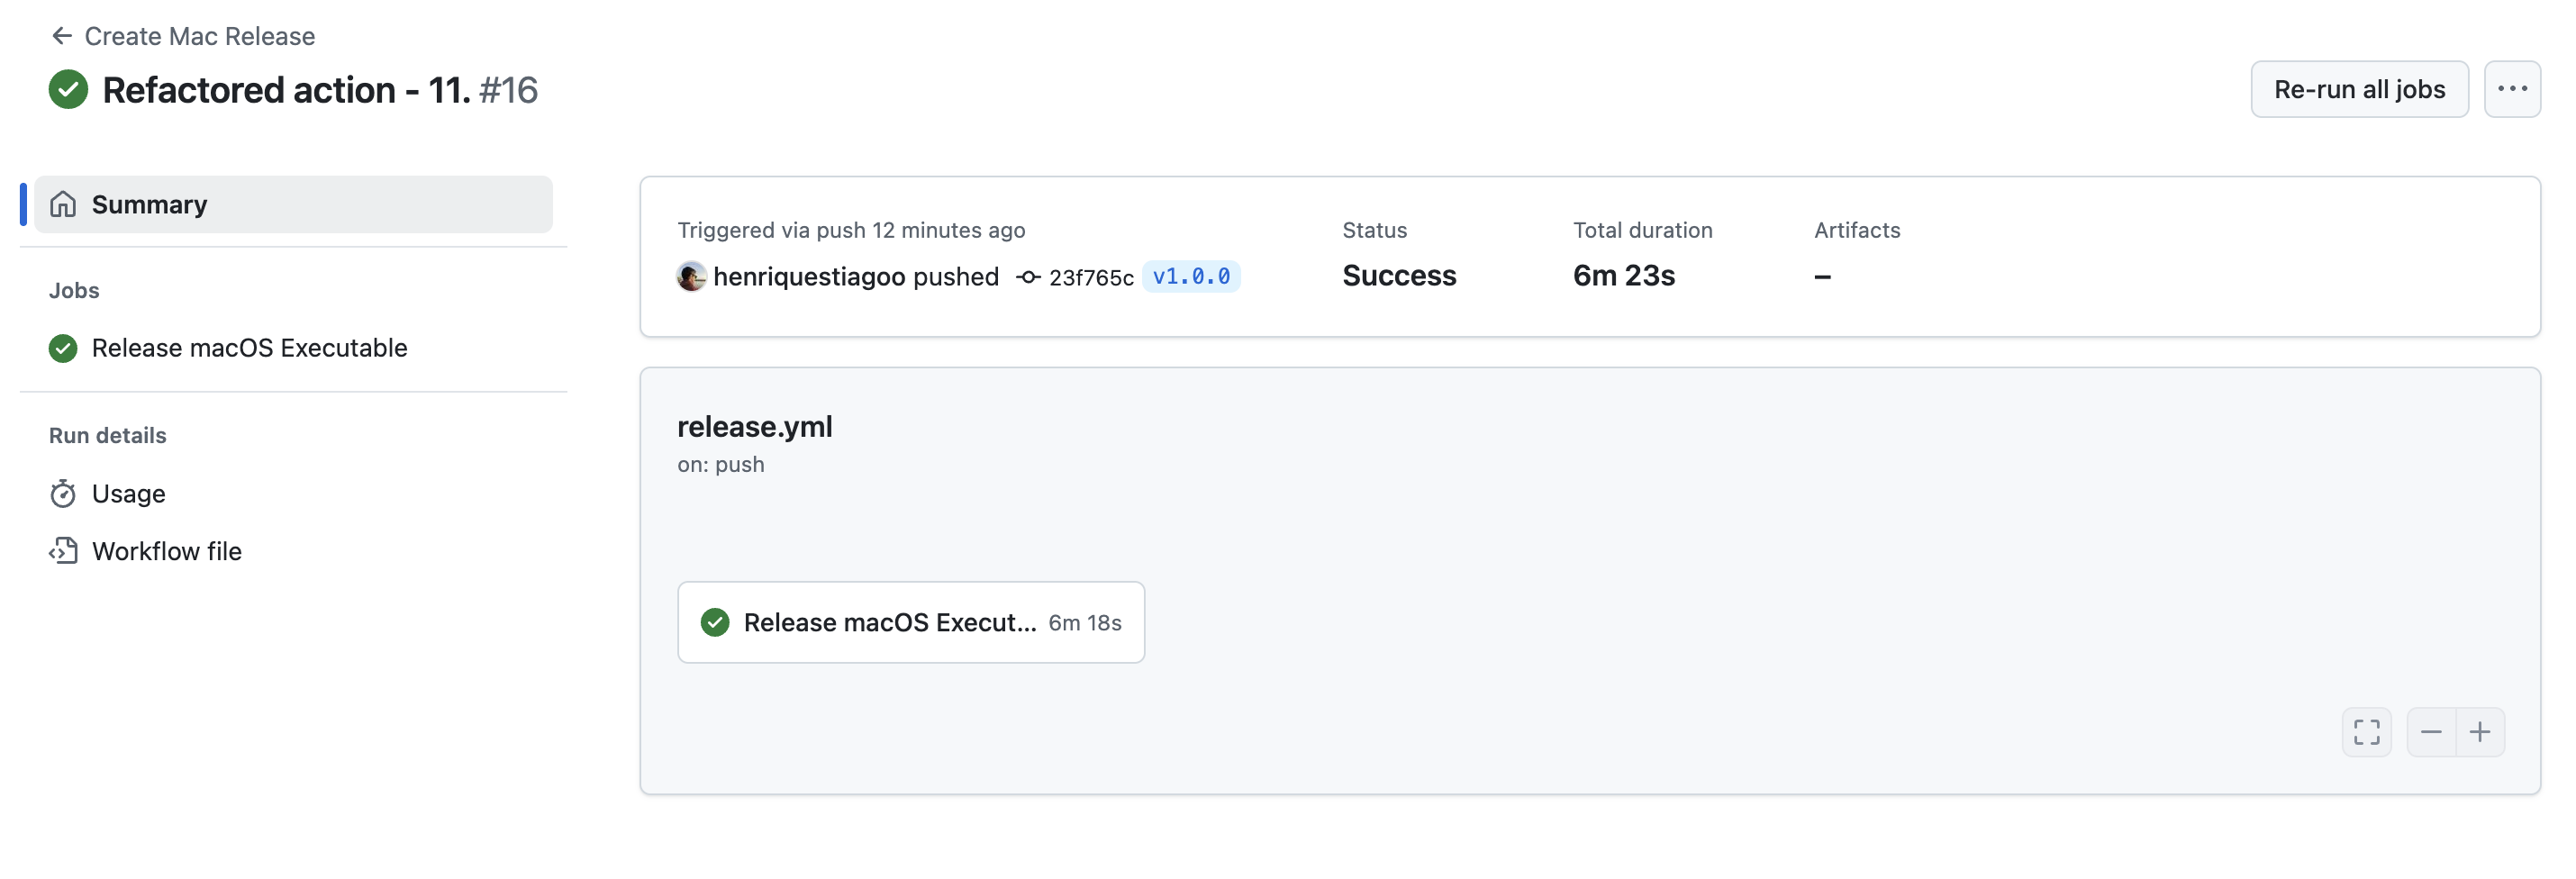
We will find our compiled binary available as an asset on the release page! 🥳
🤝 Wrapping Up
In this edition, I walked you through setting up a GitHub Actions workflow that automatically builds and publishes your Swift command-line tools whenever a new tag is pushed to your repo.
Have a great week ahead 🤎
Have any feedback, suggestions, or ideas to share? Feel free to reach out to me on Twitter.